



Custom Reporting
What is "Custom Reporting"?
Custom reporting provides you with the flexibility to tailor your reports by selecting the specific fields and criteria you want to include. Additionally, this feature allows you to assign personalized names to your reports and save them for future use.
Custom Reporting Options
Upon navigating to Reports and then to Custom Reporting via your Main menu bar on the left side of your screen, you will be presented with the user interface displayed below. There are three primary areas to consider when constructing your customized reports. These are Show Fields, Where and Group By
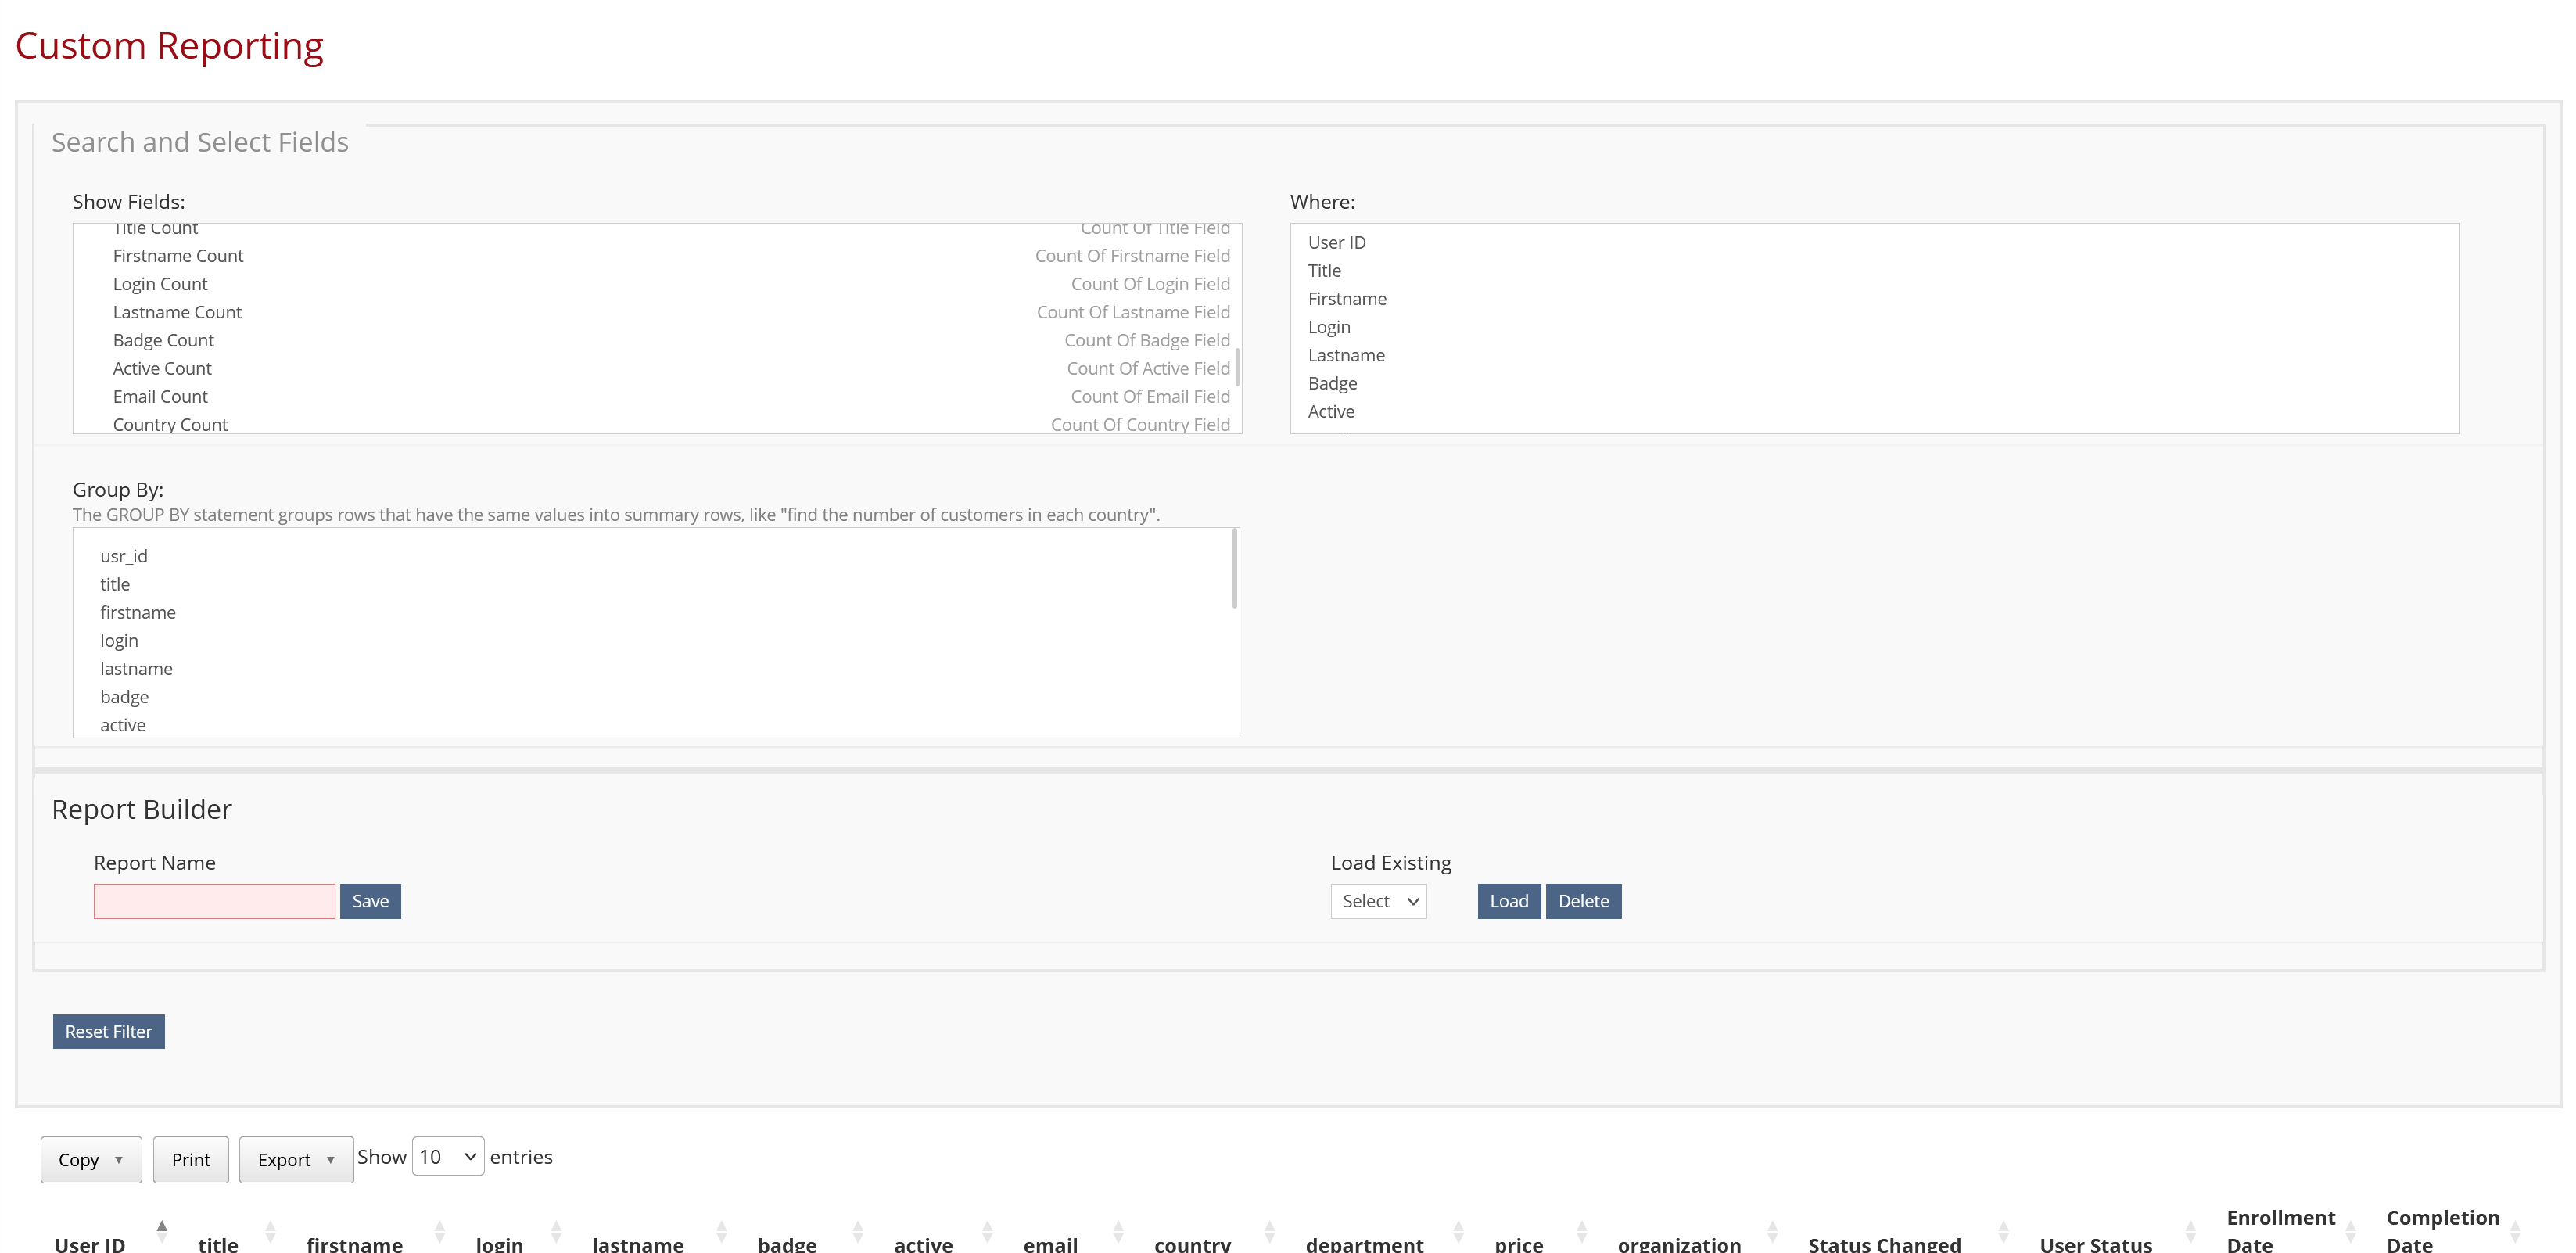
Show Fields
The "Show Fields" section allows you to choose which items you want to include in your report. This section includes a comprehensive list of all fields, as well as the option to apply the COUNT function to a field when used in conjunction with the "Group By" area. In the example below, we have selected the "First Name," "Last Name," and "Email" fields for all users in the system. Once these fields are selected, they will populate the table below with a filtered list of records.
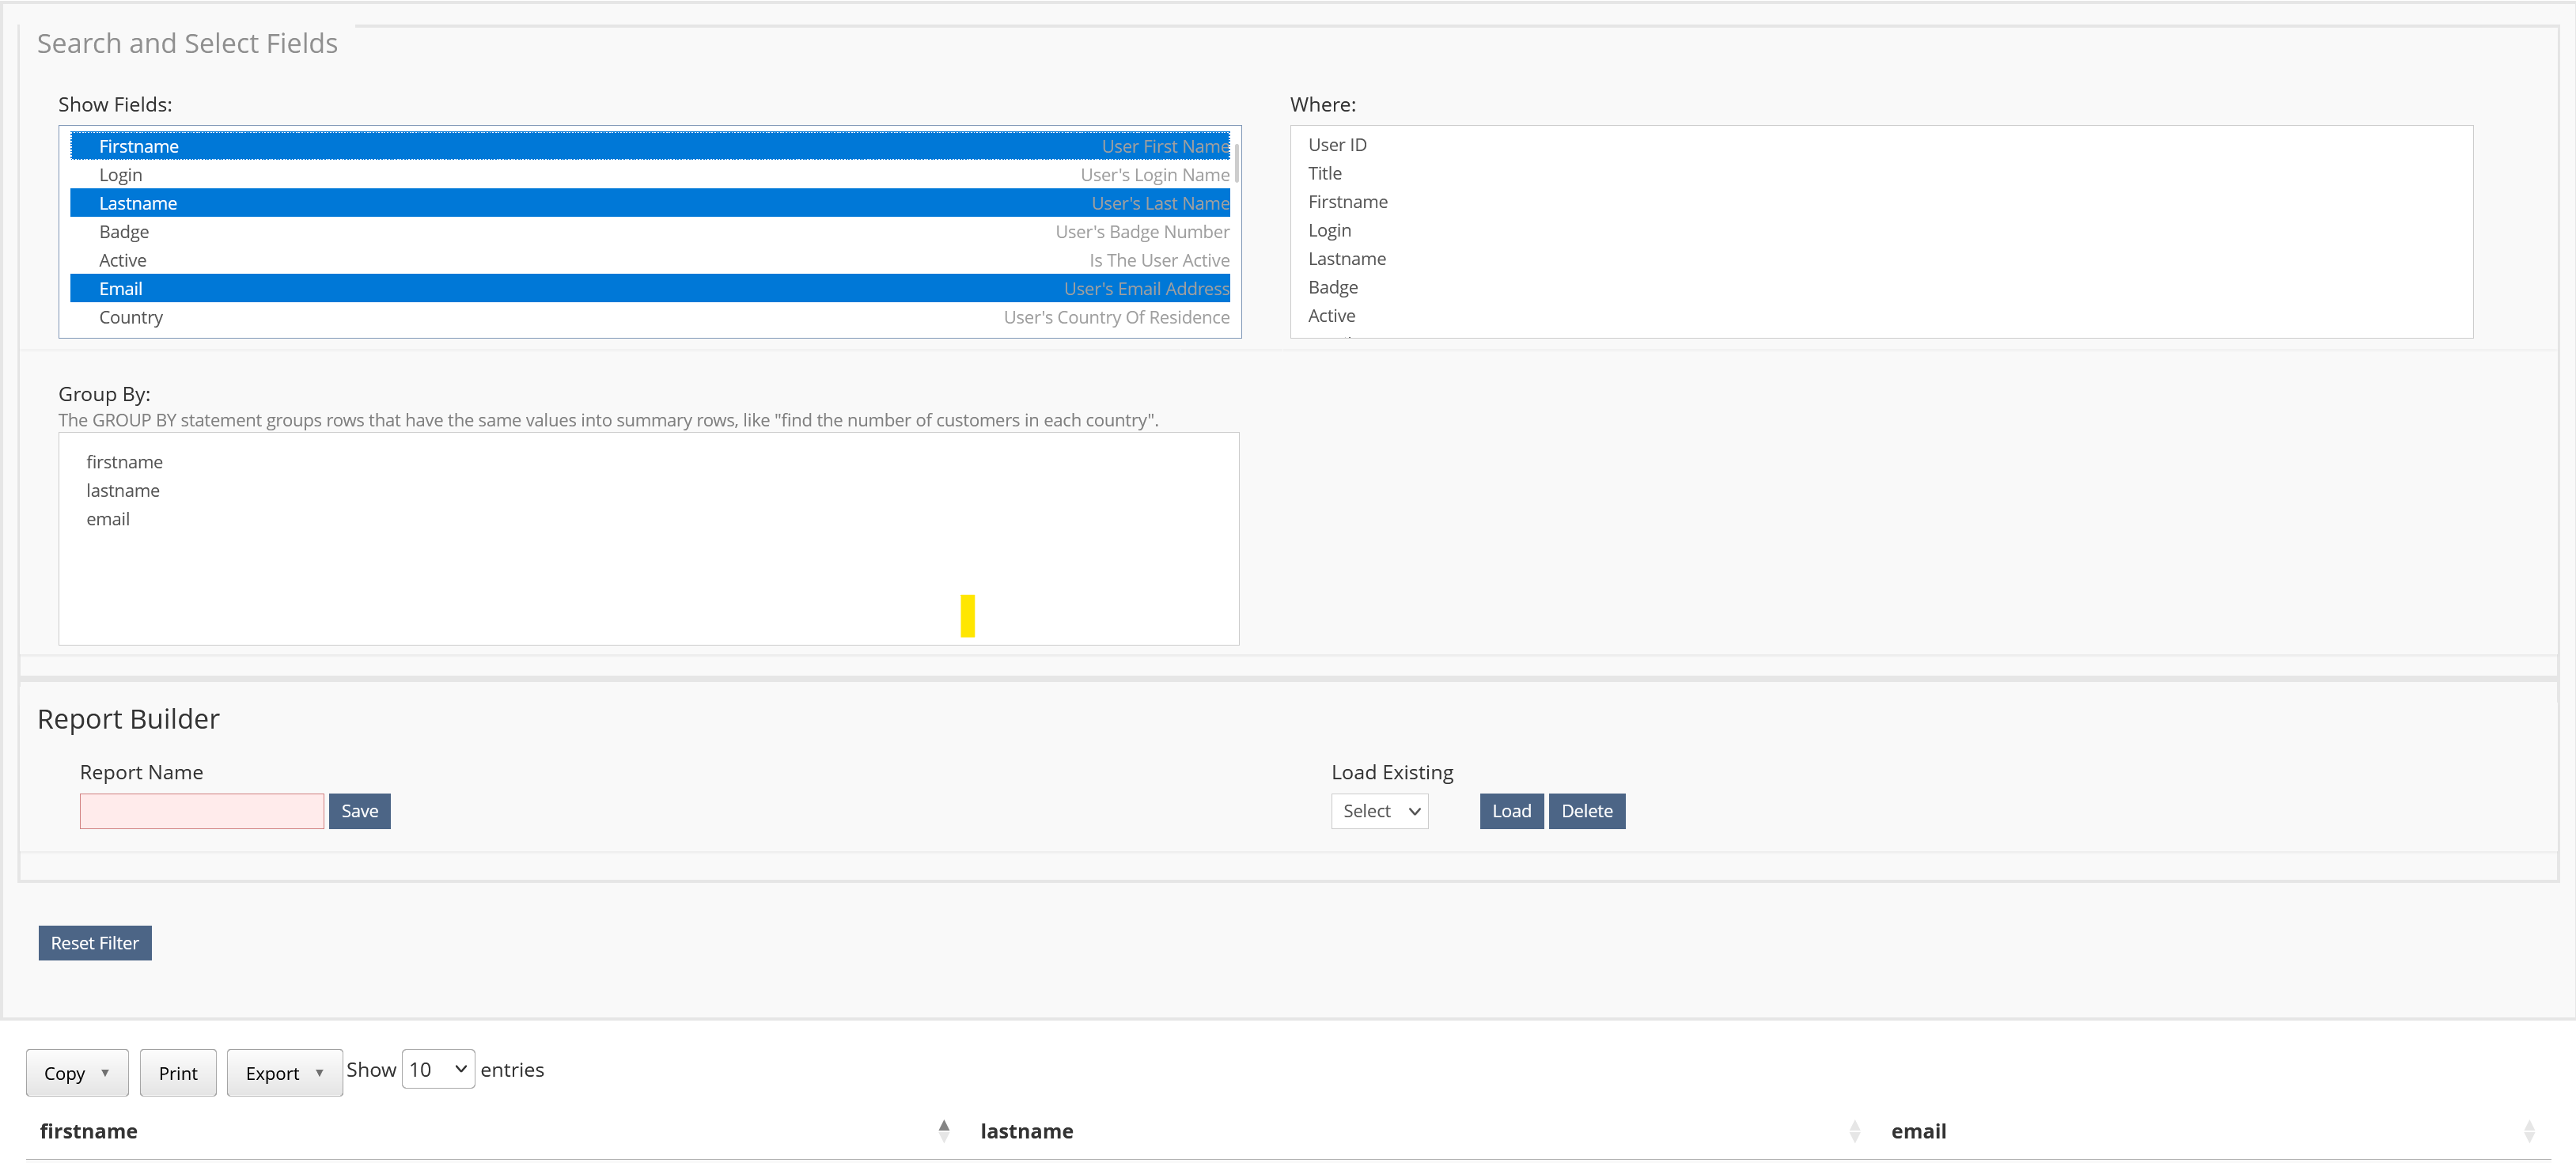
Where
The "Where" section enables users to apply filters to any field, regardless of whether it has been selected or not. The available filter options will vary depending on the item type selected; for instance, if a date is chosen, users will have access to a calendar function.
To apply a filter to a specific field, choose the relevant item from the dropdown menu. In this instance, let us consider the 'Email' field as an example.
Upon clicking on the 'Email' field, a filter area will be displayed.
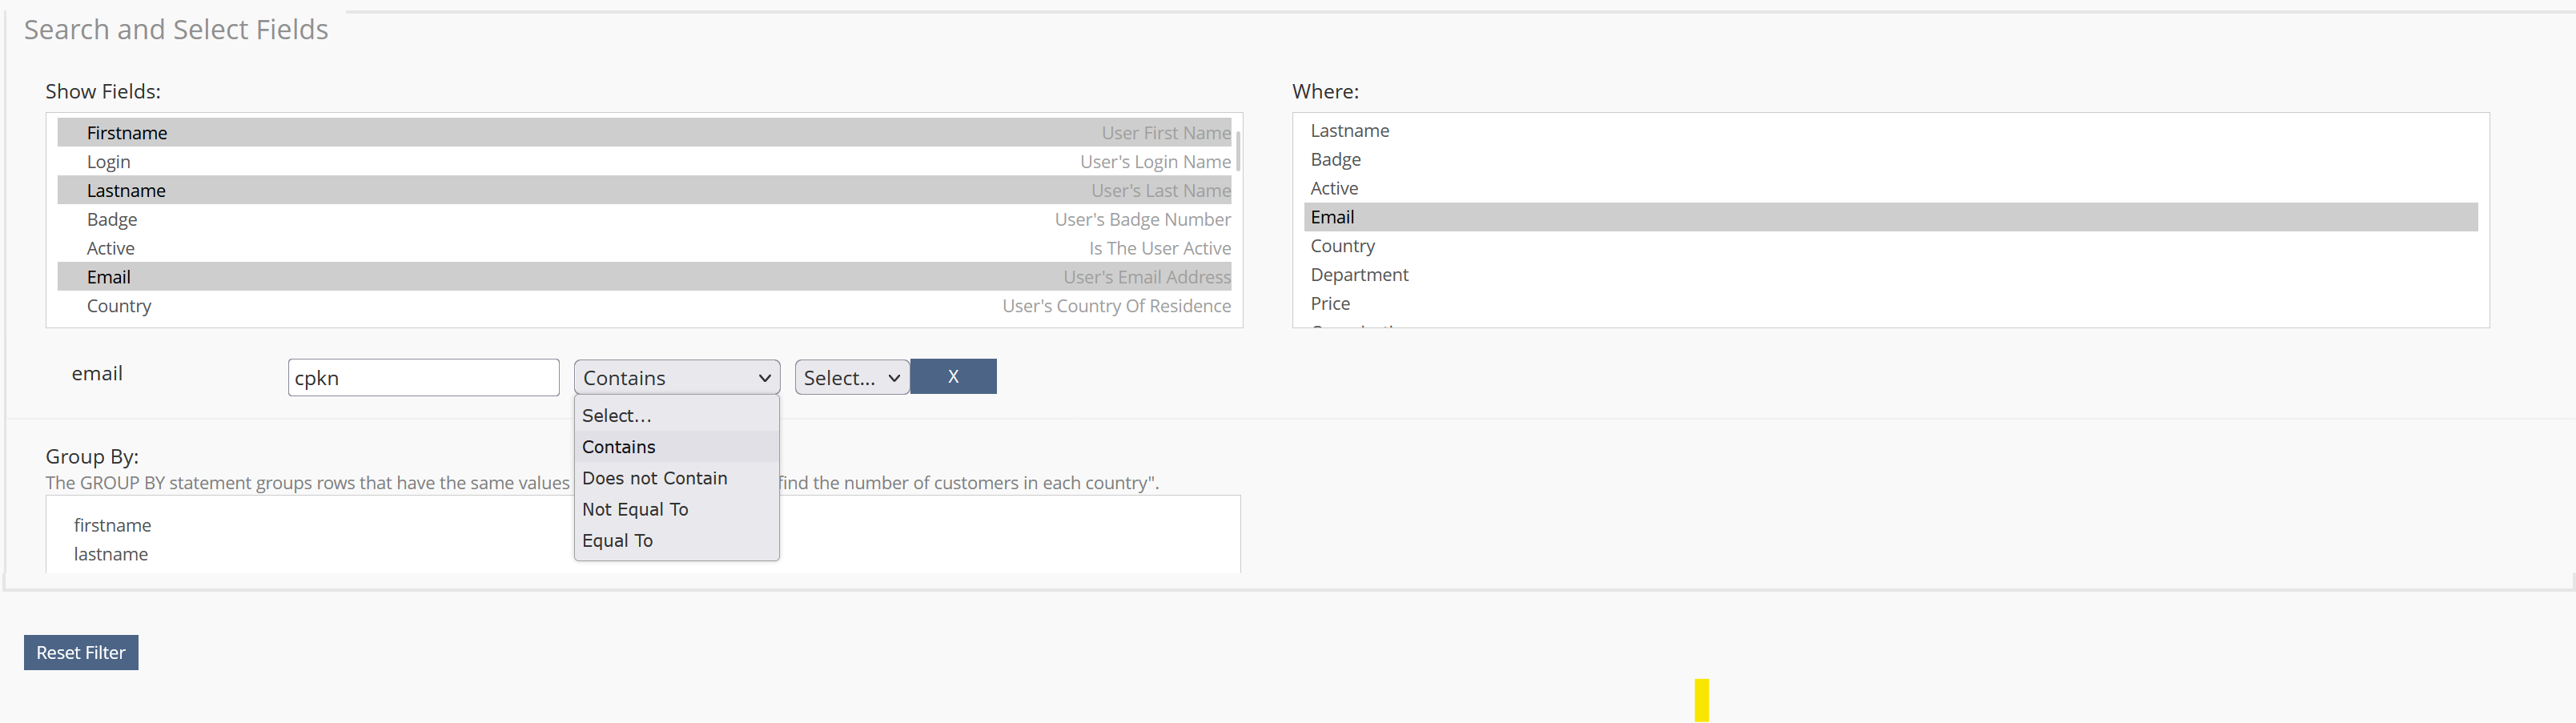
Within the designated text area, we may enter our filter request, which, in this case, pertains to identifying email addresses that include the term 'cpkn'. To summarize our report thus far, we are seeking to display the first name, last name, and email of all individuals whose email addresses meet this criteria.
What About Multiple Wheres?
If you wish to apply filters to multiple fields, you may select the relevant fields from the 'Where' list, following a process similar to the previous step. Upon doing so, multiple filter areas will appear. To facilitate this process, the second dropdown menu, which includes 'And' and 'Or' options, can be utilized. This feature enables the chaining together of multiple filters using either 'And' or 'Or' clauses.
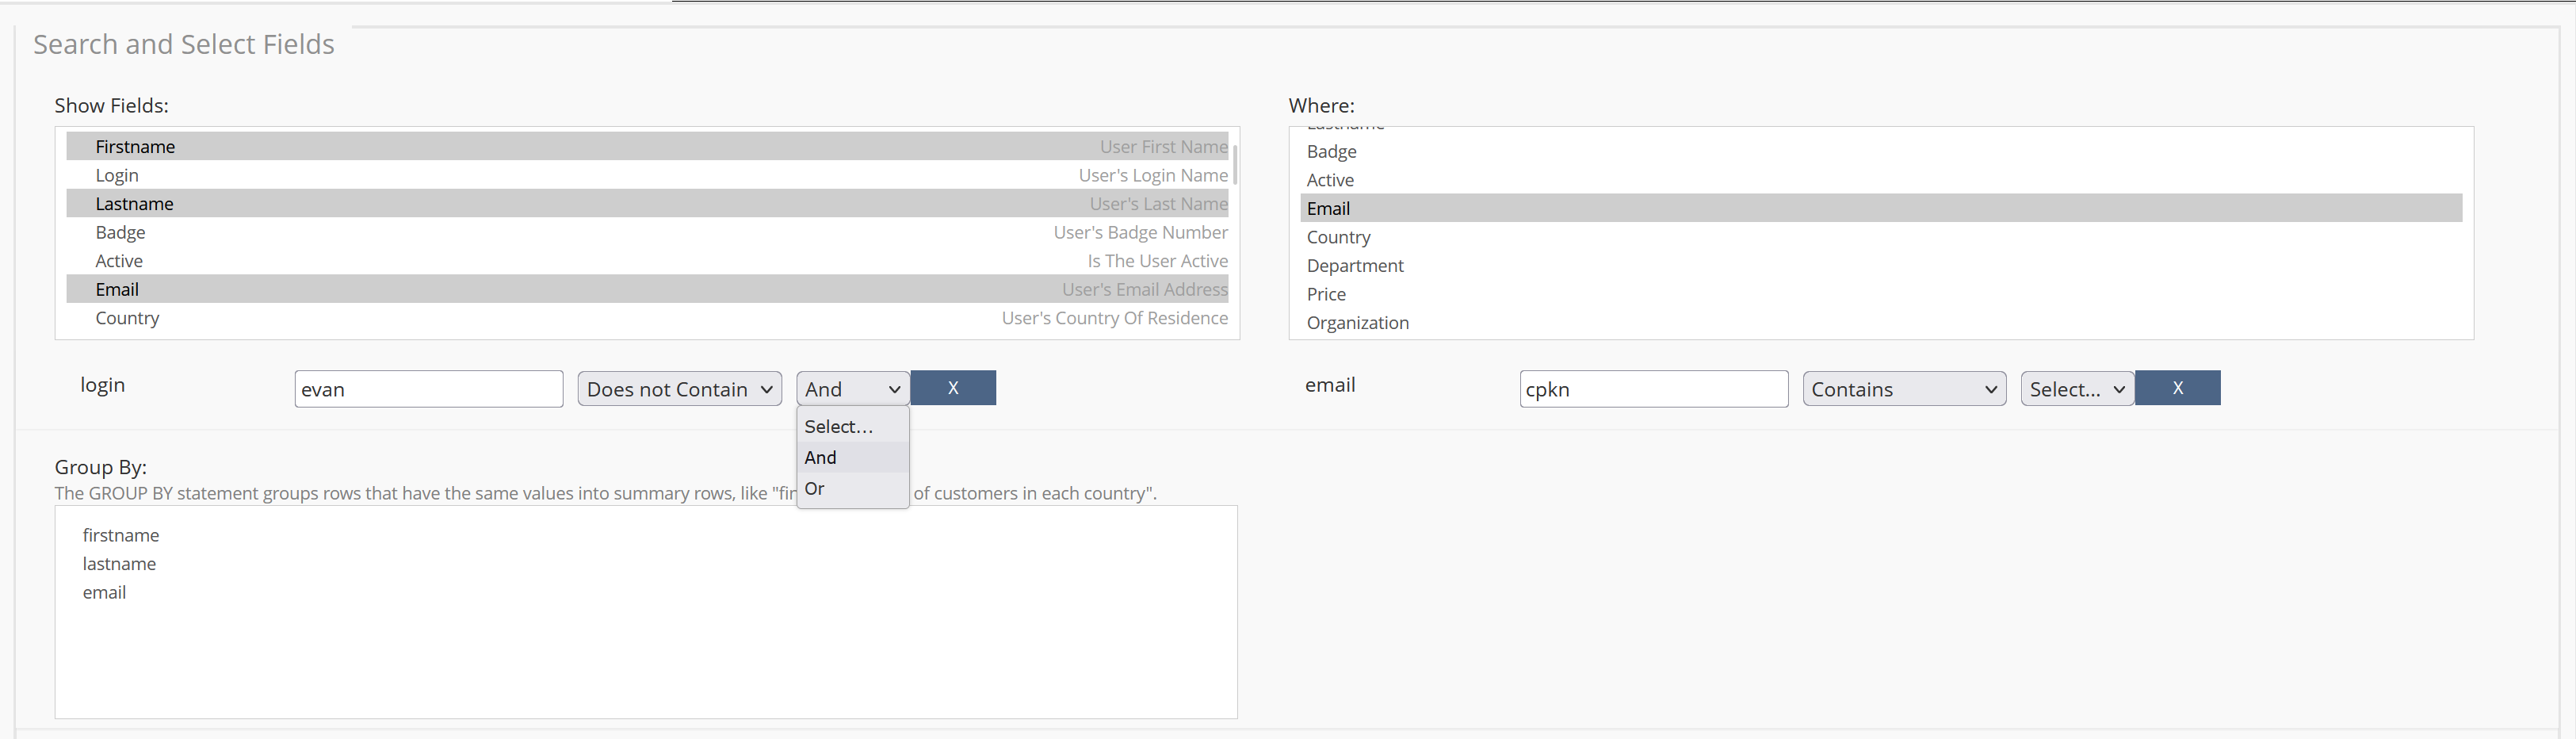
The selection of 'And' or 'Or' clauses can significantly alter the meaning of your filters.
Consider the difference between the following phrases.
When 'And' is selected, the resulting report will read as follows:
"Display the first name, last name, and email of all individuals whose login does not contain the term 'evan' and whose email address includes the term 'cpkn'."
On the other hand, if 'Or' is selected, the report will instead state:
"Display the first name, last name, and email of all individuals whose login does not contain the term 'evan' or whose email address includes the term 'cpkn'."
What About Multiple Filters on One Field?
If you need to filter multiple values on a single field, you can use the "|" character between the items within the same input. This will create a 'sub-query' that utilizes 'Or' statements to filter the data.
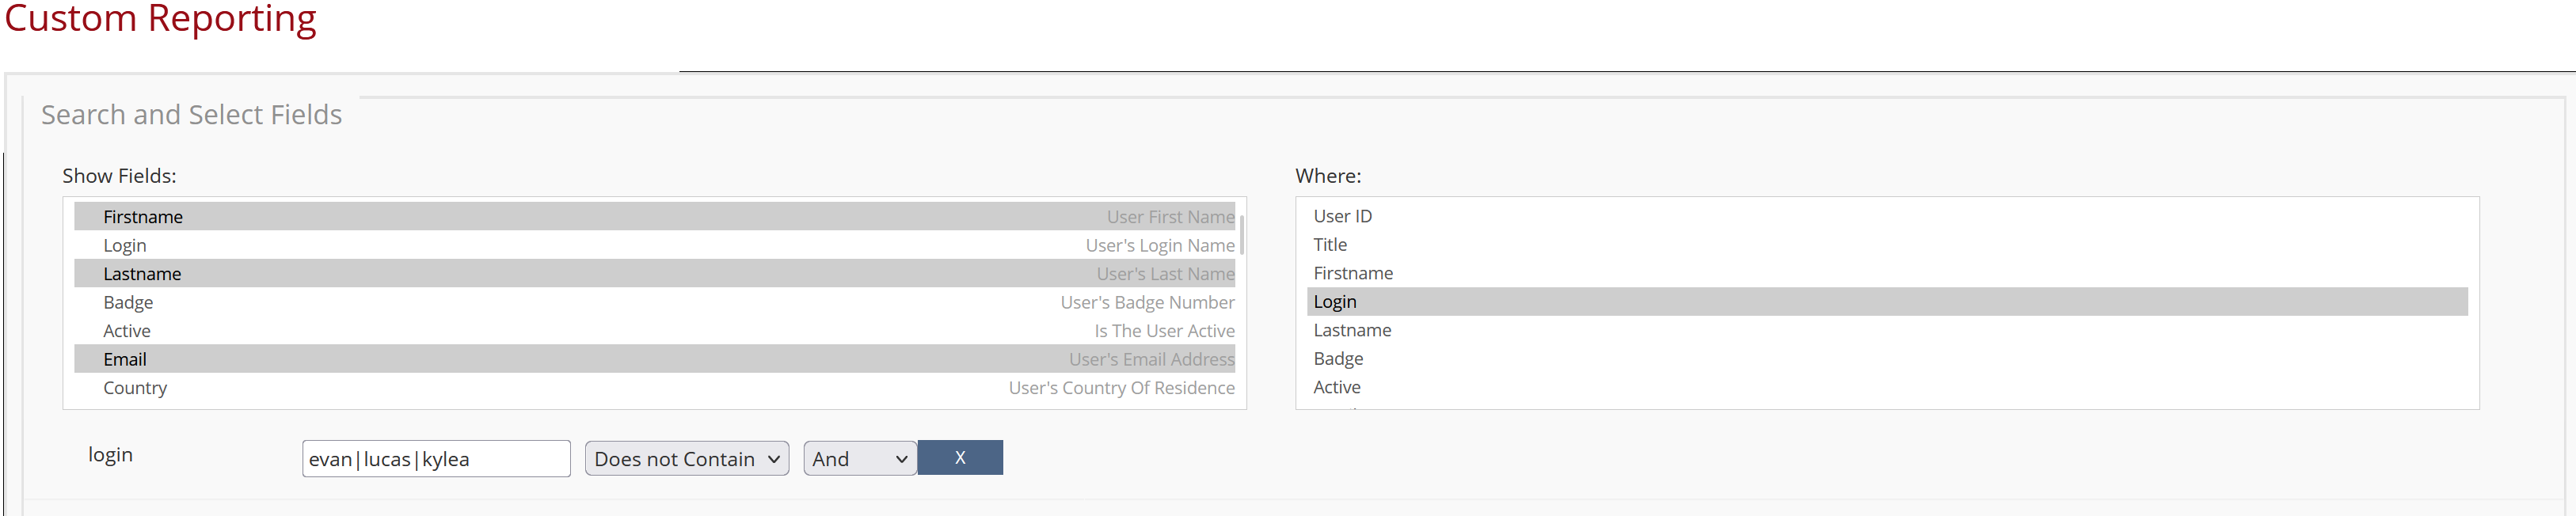
Utilizing the "|" field, our report now reads: "Display the first name, last name, and email of all individuals whose login does not contain 'evan', 'lucas', or 'kylea'."
Group By
The GROUP BY statement can be used in conjunction with the 'Count' field within the 'Show Fields' area.
This combination facilitates the aggregation of data by grouping together rows with similar values, and subsequently determining the count of those grouped rows. For example, one could use the GROUP BY statement to determine the number of enrollments within each course by utilizing the 'Login Count' field.
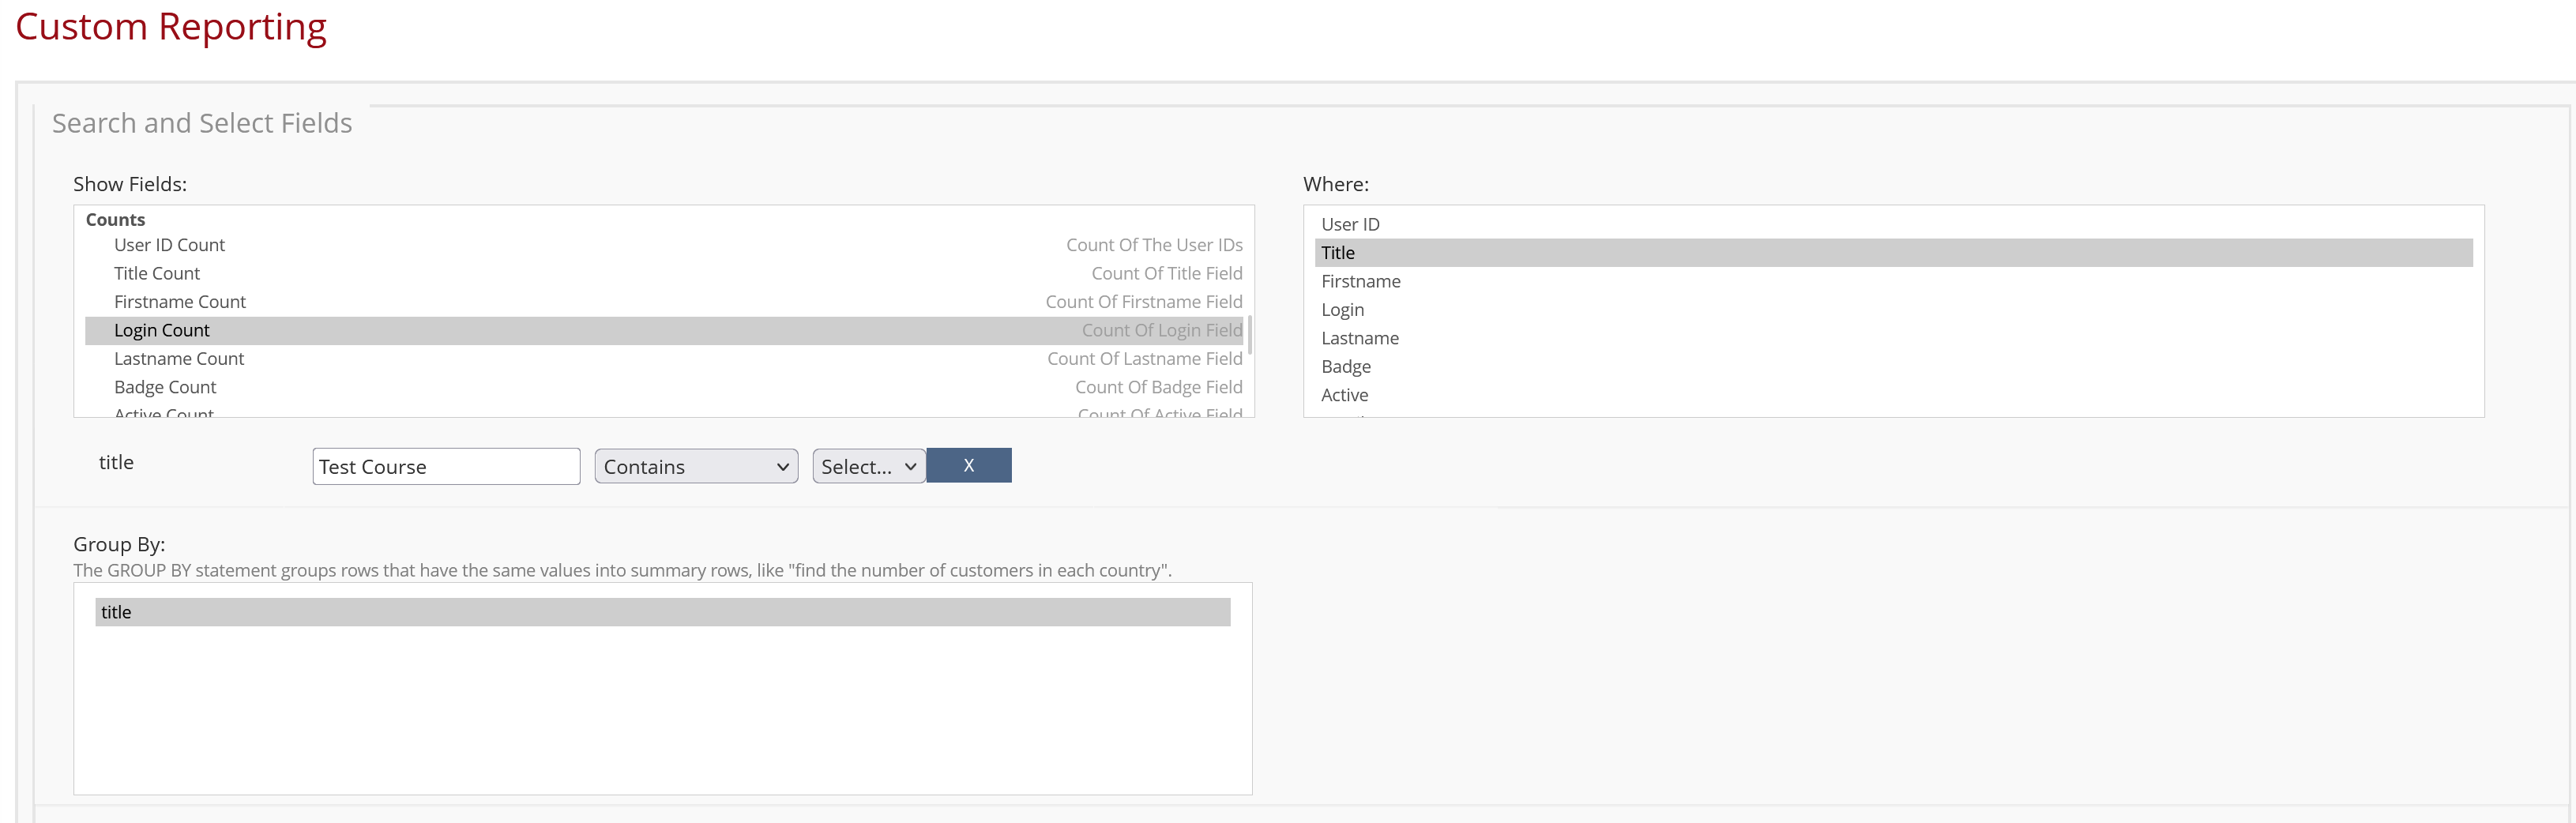
In the aforementioned example, we have selected 'Title' and 'Login Count' in the 'Show Fields' section.
Furthermore, we have applied a filter to retrieve only those courses that have a title of 'Test Course'
As we have selected 'Login Count' and wish to obtain a total count of all users in the course, we need to group the records by the course title. In other words, we need to aggregate all the records with a course title of 'Test Course' into a single count.

Saving a Report
After finalizing the report to your desired specifications, you can save it by entering a name in the 'Report Name' field under 'Report Builder' and clicking on the 'Save' button. This action will store the report in the list on the right, allowing you to access it conveniently at any time.

Loading a Report
To access a saved report, navigate to the 'Load Existing' section and select the desired report from the dropdown menu. Once you have made your selection, click on the 'Load' button, and the report will load immediately.

Exporting
The following export options are available for data in your report.
CSV (Comma Separated Values) Export:
This feature allows users to export table data in a CSV format. CSV is a popular file format for data exchange between different software applications.
Excel Export:
The Excel export feature allows users to export table data in an Excel file format. This feature can be useful for those who want to perform advanced data analysis or create charts and graphs using Excel.
Copy:
The Copy to Clipboard feature allows users to copy the selected rows of the table to the clipboard. This feature can be useful for those who want to quickly copy and paste data into other applications.
Print:
The Print feature allows users to print the table directly from the web page. This feature can be useful for those who want to generate a hard copy of the table data
Examples
Scenario:
You'd like to report on how many people were enrolled in '2SLGBTQ+' in 2022.
1) select Title, Login Count from the Show Fields section.
2) select Enrollment Date, Title within the Where section.
3) enter your dates with the 'Between' clause in the dropdown for Enrollment Date and select AND from the secondary dropdown.
4) enter '2SLGBTQ+' in the title filter, with 'contains'.
5) select "title" in the group by section, this will group all enrollments based on the title.
6) Optionally name and save your report.
and that's it, you should have report for enrollments in 2SLGBTQ+
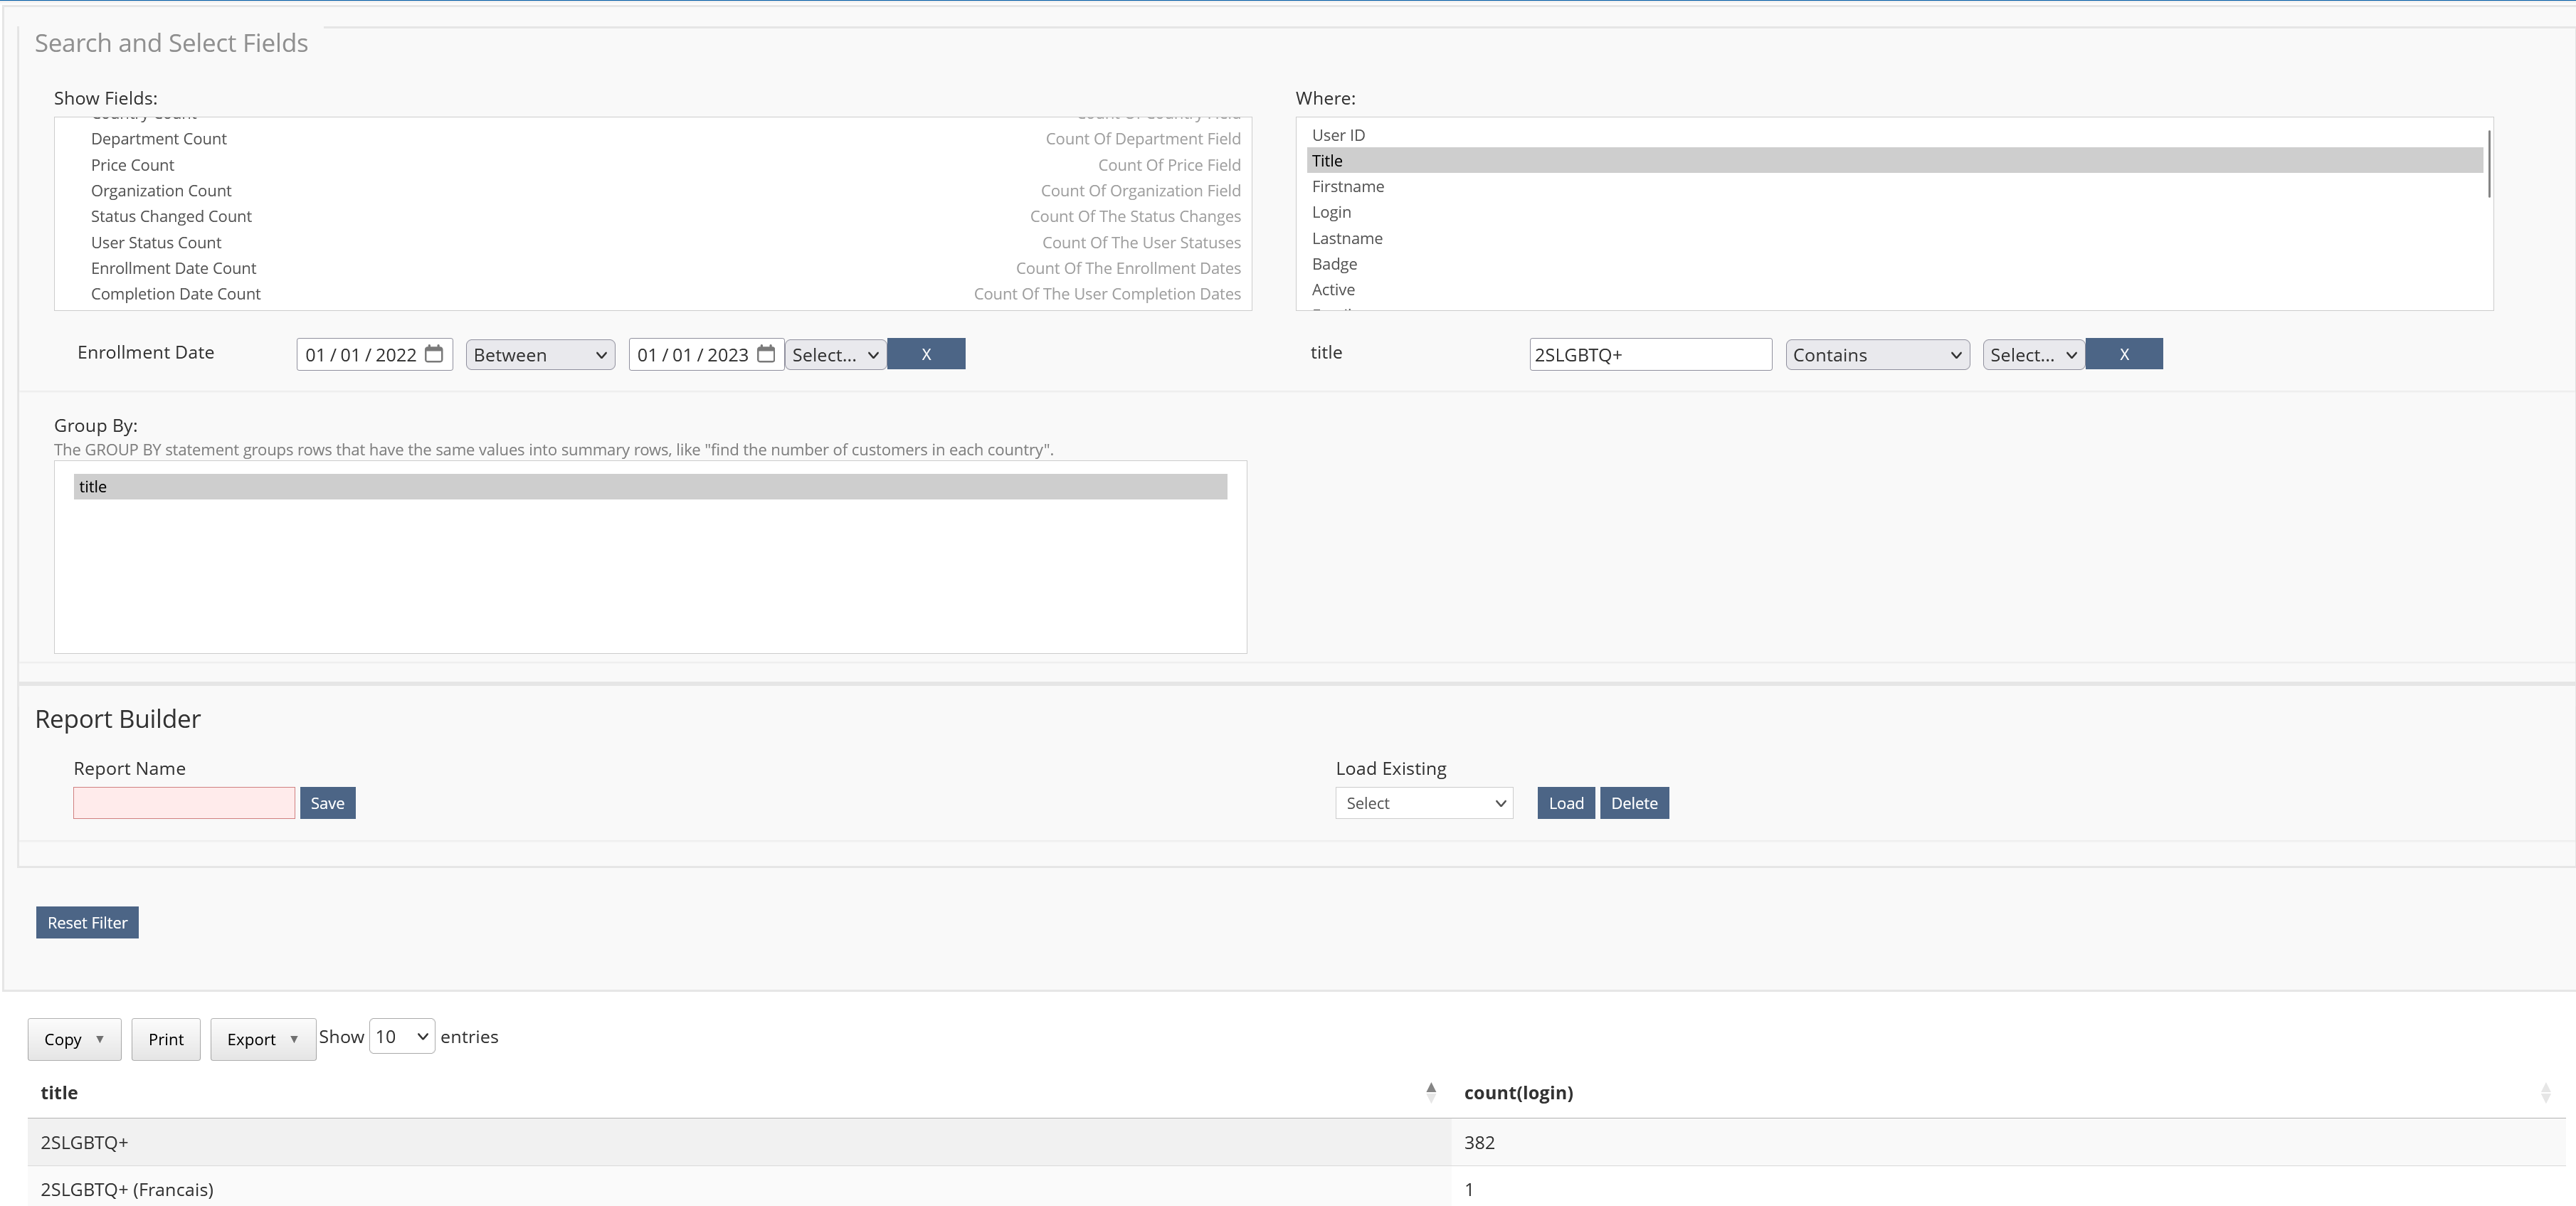
Click play to follow along with how to create your own customized reports.